Advanced features
This page is an introduction to dvda-author's advanced usage for complex projects.
1. Menu authoring
Top menus facilitate navigation with track links. A top menu is a
screen that may be called by pressing on the "(Top/Main)
menu" button of your DVD-player remote control.
Menu style
Two types of top menus may be created:
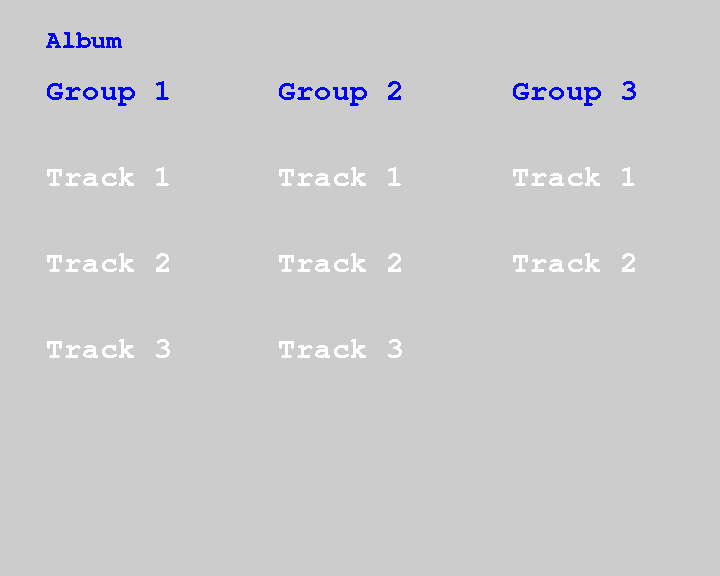
- List menus, which are continuous. Below is an example:

- Hierarchical menus, with a first screen listing only links to group menus. Below is another example:


To automatically create a hierarchical menu, use:
--topmenu --menustyle hierarchical
There will be as many screens as there are groups, with an extra first screen listing groups.
Attention: You should not use more than 32 tracks per group with this type of menu.
To create a standard list menu, just use --topmenu. There are no limitations as to the number of tracks per group in this case (under the normal 99-track limit).
You can also author the top menu Mpeg file with other tools. This will be the case, in particular, when a motion menu (with or without sound) is used.
In this case, use:
--topmenu mpeg_filepath
Currently this option is only supported with list menus (and just one menu screen).
- Active menus, which are actually still pictures displayed while a track is playing.
Automatically-created links to tracks will appear just as in automatic top menus, yet in different colors.
You may use the links either to navigate within the same group or to jump from one track of any group to any track of another group.
Below is an example created for a test:
Topmenu Active menu


Active menus may be generated along with a top menu, or without it.
Command line is simply:
--menustyle active
and should you combine top menus and active menus, use:
--topmenu --menustyle active
Colors
Predefined colors can be changed using the following command line switch:--palette t,b,h,s
in which t,b,h,s are colors in alpha-YCrCb 32-bit hexadecimal coding, separated by commas:
- t is the color of the track text (white by default)
- b is the color of the background screen (black by default)
- h is the color of the highlighting element (red by default)
- s is the color taken by track text when the link is selected and activated, for about 1 second (depending on players)
alpha-YCrCb codes are one of the various ways of encoding colors. If needed, you will find a useful color tester here.
and an explanation of the YCrCb model here.
It is normally useless to use non-zero alpha values (the first byte of the 32-bit sequence).
Example: --palette 0x0051F05A,0x00108080,0x00286DF0,0x00902235
yields red track text against a black background with a blue highlighting element and text turning green on link activation.
Below is another example of what a menu looks like, when created with a grey background (command line: --palette 0x0051F05A,0x00D18080,0x00286DF0,0x00902235):


Fonts
The default font is Courrier-Bold. The size of the font is computed automatically. It depends on several factors, like the number of groups to be displayed on each screen and the number of tracks per group. You can change both font type and font size by adding:--font font_type,font_size,N
in which N is the number of pixels of the side of a square in which a letter of size 10 can contain. N depends on the font. For Courrier-Bold, N=6. For other fonts, N is not tabulated and should be experimentally determined. It should be close to 6 in general.
Example:
--font Courrier-Bold,20,6 The list of available fonts is that of the mjpeg tools used by dvda-author to create the pictures. It can be displayed by launching mogrify -list fonts .
Highlighting element
The highlighting motif by default is an underline. It can be changed by specifying:
--highlightformat -1
for automatic menu authoring with little square before titles. Below is
an example of what the above menu would become with this highlighting
option added to command line:

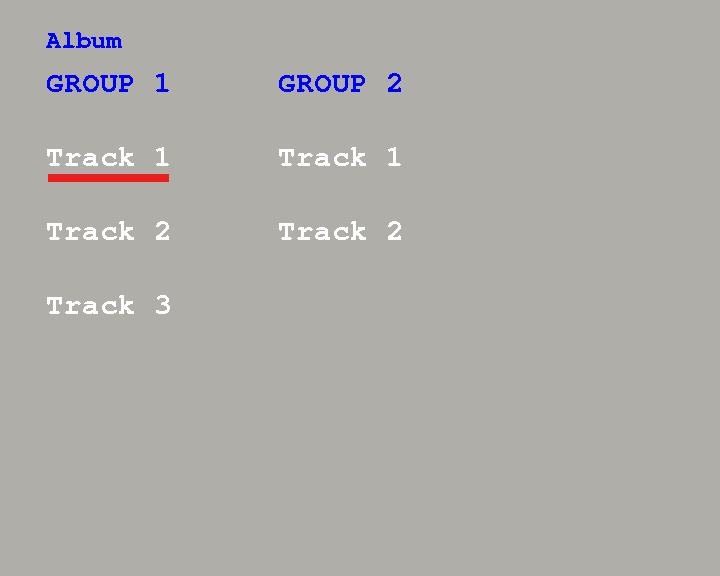
--highlightformat 1
for button highlight as below (first track is selected again):

Background picture
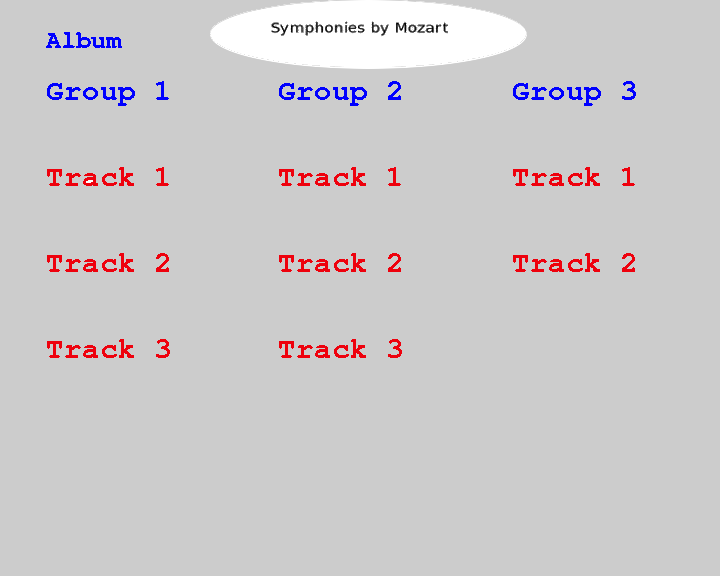
The background picture should always be of JPEG format. Below is an example, in which background.jpg is a grey screen ornated with a white ellipsis containing "Symponies by Mozart". The group and track labels are created by the --topmenu option and added to this background:
You can also specify different background pictures, using commas to separate files:
--background file0.jpg,file1.jpg,...,fileN.jpg
for N menus. Again, pictures should always be of JPEG format.
Number of menus and menu columns
Whether you create menus using the automatic default procedure or by
adding user-defined details, it is possible to create a given number of
N menu screens by adding:
--nmenus N
However this option is only available for list menus, not hierarchical
menus, which have as many menu screens as there are groups (plus the
group-listing menu).
You can also force the number of columns per screen (by default 3):
--ncolumns C
It is not advised to use values higher than 4. Also, be careful not to
specify both --nmenus and --ncolumns options,as incompatibilities may
arise. Normally, N and C are related by the following equation: N =
(int) number of groups/C (+ 1 if the ratio is not an integer)
2. Still pictures and slideshows
In addition to menus, slideshows can be created. Pictures will be shown while a track is playing, with transition effects and a user-defined timeline or, alternatively, with browsable pictures, using the player's remote control.
A still picture is the particular case in which there is just one picture per audio track.
Still pictures
You will need to author pictures of jpg format with independant software like the Gimp. Once created, rename pictures as follows:
pic_000.jpg, ..., up to pic_999.jpg (maximum).
Then gather them in the same directory dir. Add:
--stillpics dir
Slideshows
To create a slideshow you will first need to author slides for each track and choose your timeline, ie at which time after the start of the track each slide starts and ends.
You need to enter pictures manually as follows. If pjk is picture j of track k, enter:
--stillpics p11,p21,...,pn1-p12,p22,...,pn2-...with tracks separated by hyphens and pictures by commas.
Example:
--stillpics image1.jpg,image2.jpg,image3.jpg-image4.jpg,image5.jpg,image6.jpg
If there are no pics for a track use -- as below (no pics for second track):
--stillpics image1.jpg,image2.jpg,image3.jpg--image4.jpg,image5.jpg,image6.jpg
You can also optionally choose slideshow options, like transition effects.
Here is a link to a playable slideshows (converted to mpg):
To enter options, use:
--stilloptions options
Separate options with commas. Each option applies to ranked pic,
so use rank=k to indicate that the following options apply to the k-th
picture, starting with 0. Ranks are counted across tracks, so for
example
if you have three tracks with two slides each, the corresponding
options will be:
--stilloptions rank=0,(options 0),rank=1,(options 1),rank=2,(options 2),rank=3,(options 3),rank=4,(options 4),rank=5,(options 5)
Transition effects should be chosen among the following ones:
- fade or just 'f': picture will gradually fade out or in
- dissolve or just 'd': picture will dissolve into a blank screen
- top or just 't': top-wipe effect, with the picture sliding down from the top of the screen
- bottom or just 'b': bottom-wipe effect, with the picture sliding up from the bottom
- left or just 'l': left-wipe effect, with the picture sliding across from the left handside
- right or just 'r': right-wipe effect, with the picture sliding across from the right handside
These effects can be applied either at the start or at the end of the slide.
To apply a transition effect at the start use the following syntax:
--stilloptions (...),rank=k,(...),starteffect=effect,(...)
To apply a transition effect at the end use endeffect instead of starteffect.
To to set the time line you need to choose a set of time marks,
ie how many seconds elapsed between the start of the track and the
onset of picture.
Use ...,start=T,... as a suboption of --stilloptions to set the time mark at T seconds for the corresponding picture.
Optionally, the duration of transition effects can also be set, both for start effects and end effects.
Use ...,lag=L,... to set the duration of the following transition effect at L seconds. Below is a complex example:
--stilloptions rank=0,start=5,lag=2,starteffect=fade,lag=5,endeffect=bottom,rank=1,start=25,lag=3,starteffect=left
Here the first picture will be shown after 5 seconds with a 2-second
fade-in effect. The picture will disappear in a 5-second bottom-wipe
effect and be replaced by another picture 25 seconds after the start of
the track, with a 3-second left-wipe start effect.
3. Display aspect
Currently only PAL, SECAM and NTSC standards are supported. PAL is enabled by default. To switch to NTSC, use:
--norm ntsc
and for SECAM, use:
--norm secam
Display ratio can also be customized. By default, display will be determined by your picture input.
To switch to 16:9, use:
--aspect 3and
--aspect 2
for 4:3
4. Channel assignment
DVD-Audio supports up to six channels in one of 21 combinations of channel assignments. These combinations place the channels into two groups, referred to as Group 1 and Group 2. In each group, sample rates can be specified independently.
However, the sample rates within each group must be the same, and the Group 2 sample-rate must be an even multiple of Group 1.
Within groups, bit rates may differ but sample rates cannot.
The DVD-Audio channel assignments 8 to 12 are almost identical to the channel assignments 13 to 17, and differ only in the way the channels are grouped.Currently dvda-author only supports encoding to or decoding from channel assignments with identical sample rates.
| Channel assignment index\Channel layout | 1 | 2 | 3 | 4 | 5 | 6 |
|---|---|---|---|---|---|---|
| 0 | Mono | |||||
| 1 | L | R | ||||
| 2 | Lf | Rf | S* | |||
| 3 | Lf | Rf | Ls* | Rs* | ||
| 4 | Lf | Rf | Lfe* | |||
| 5 | Lf | Rf | Lfe* | S* | ||
| 6 | Lf | Rf | Lfe* | Ls* | Rs* | |
| 7 | Lf | Rf | C* | |||
| 8 | Lf | Rf | C* | S* | ||
| 9 | Lf | Rf | C* | Ls* | Rs* | |
| 10 | Lf | Rf | C* | Lfe* | ||
| 11 | Lf | Rf | C* | Lfe* | S* | |
| 12 | Lf | Rf | C* | Lfe* | Ls* | Rs* |
| 13 | Lf | Rf | C | S* | ||
| 14 | Lf | Rf | C | Ls* | Rs* | |
| 15 | Lf | Rf | C | Lfe* | ||
| 16 | Lf | Rf | C | Lfe* | S* | |
| 17 | Lf | Rf | C | Lfe* | Ls* | Rs* |
| 18 | Lf | Rf | Ls | Rs | Lfe* | |
| 19 | Lf | Rf | Ls | Rs | C* | |
| 20 | Lf | Rf | Ls | Rs | C* | Lfe* |
Keys:
Bold in Group1
* In Group2
 L-R: Stereo
 Lf: Left front
 Rf: Right front
 Ls: Left surround (behind)
 Rs: Right front
 C: Center
 Lfe: Low Frequency Effect (Subwoofer)
 S: Surround (just one behind)
 Ls: Left surround
 Rs: Right surround
Channel assignments are mentioned in the standard console output before processing as in the above table, with index 2 replacing the star: for example, channel assignment of index 20 is reported as Lf-Rf-Ls-Rs-C2-Lfe2.
MLP input files have a similar channel assignment set of values. The MLP channel assignment value is retained in the corresponding DVD-Audio track.
When processing WAV files, dvda-author automatically derives channel assignment from the corresponding information in WAV headers, if they conform to the extensible variant of the format, in principle mandatory for multichannel and all 24-bit audio.
More specifically, Microsoft documents WAV extensible channel layouts as follows:
SPEAKER CONFIGURATION   HEXADECIMAL CODE
SPEAKER_FRONT_LEFT            0x1
SPEAKER_FRONT_RIGHT           0x2
SPEAKER_FRONT_CENTER          0x4
SPEAKER_LOW_FREQUENCY         0x8
SPEAKER_BACK_LEFT             0x10
SPEAKER_BACK_RIGHT            0x20
SPEAKER_FRONT_LEFT_OF_CENTER  0x40
SPEAKER_FRONT_RIGHT_OF_CENTER 0x80
SPEAKER_BACK_CENTER           0x100
SPEAKER_SIDE_LEFT             0x200
SPEAKER_SIDE_RIGHT            0x400
SPEAKER_TOP_CENTER            0x800
SPEAKER_TOP_FRONT_LEFT        0x1000
SPEAKER_TOP_FRONT_CENTER      0x2000
SPEAKER_TOP_FRONT_RIGHT       0x4000
SPEAKER_TOP_BACK_LEFT.        0x8000
SPEAKER_TOP_BACK_CENTER       0x10000
SPEAKER_TOP_BACK_RIGHT        0x20000
dvda-author uses the following correspondance table between the above WAV layouts and DVD-Audio channel assignment:
| WAV channel layout | Hexadecimal value | DVD-A Channel assignment index |
|---|---|---|
| SPEAKER_FRONT_CENTER | 0x4 | 0 |
| SPEAKER_FRONT_LEFT |SPEAKER_FRONT_RIGHT | 0x3 | 1 |
| SPEAKER_BACK_CENTER | SPEAKER_FRONT_LEFT |SPEAKER_FRONT_RIGHT | 0x103 | 2 |
| SPEAKER_FRONT_LEFT |SPEAKER_FRONT_RIGHT | SPEAKER_BACK_LEFT |SPEAKER_BACK_RIGHT | 0x33 | 3 |
| SPEAKER_FRONT_LEFT |SPEAKER_FRONT_RIGHT | SPEAKER_LOW_FREQUENCY | 0xB | 4 |
| SPEAKER_FRONT_LEFT |SPEAKER_FRONT_RIGHT | SPEAKER_LOW_FREQUENCY |SPEAKER_BACK_CENTER | 0x10B | 5 |
| SPEAKER_FRONT_LEFT |SPEAKER_FRONT_RIGHT | SPEAKER_LOW_FREQUENCY | SPEAKER_BACK_LEFT |SPEAKER_BACK_RIGHT | 0x3B | 6 |
| SPEAKER_FRONT_LEFT |SPEAKER_FRONT_RIGHT |SPEAKER_FRONT_CENTER | 0x7 | 7 |
| SPEAKER_FRONT_LEFT |SPEAKER_FRONT_RIGHT |SPEAKER_FRONT_CENTER |SPEAKER_BACK_CENTER | 0x107 | 8 |
| SPEAKER_FRONT_LEFT |SPEAKER_FRONT_RIGHT |SPEAKER_FRONT_CENTER |SPEAKER_BACK_LEFT |SPEAKER_BACK_RIGHT | 0x37 | 9 |
| SPEAKER_FRONT_LEFT |SPEAKER_FRONT_RIGHT |SPEAKER_FRONT_CENTER | SPEAKER_LOW_FREQUENCY | 0xF | 10 |
| SPEAKER_FRONT_LEFT |SPEAKER_FRONT_RIGHT |SPEAKER_FRONT_CENTER | SPEAKER_LOW_FREQUENCY | SPEAKER_BACK_CENTER | 0x10F | 11 |
| SPEAKER_FRONT_LEFT |SPEAKER_FRONT_RIGHT |SPEAKER_FRONT_CENTER | SPEAKER_LOW_FREQUENCY | SPEAKER_BACK_LEFT | SPEAKER_BACK_RIGHT | 0x3F | 12 |
WAV layouts are indicated by audio editors.
Default values are set as in the next table in the following cases:
- the WAV file layout is not listed in the above table, or
- the audio file format is FLAC, or
- the file format is neither WAV nor FLAC and there is no channel layout or none of the above channel layouts in the WAV file resulting from the conversion by SoX (option -S)
| N channels | Default channel assignment index | DVD-A channel layout |
|---|---|---|
| 1 | 0 | Mono |
| 2 | 1 | L R |
| 3 | 7 | Lf Rf C* |
| 4 | 3 | Lf Rf Ls* Rs* |
| 5 | 9 | Lf Rf C* Lfe* Ls* |
| 6 | 12 | Lf Rf C* Lfe* Ls* Rs* |
If none of the above automatic values corresponds to the user target, then channel assignment should be set on commandline using option -c or --cga followed by the litteral string of DVD channel assignment layout, each channel being separated from the following by a hyphen and Group2 channels being indexed with 2 as follows:
--cga Lf-Rf-C-Ls2-Rs2
Alternatively the channel assignment index can be used instead of the hyphenated list of channels. Option --cga only applies to audio files entered after -g and cannot apply to the -i syntax. It must follow a -g option and the channel assignment values apply in successive order to the -g audio files entered on command line.
Example:
dvda-author -g a.wab b.flac c.wav --cga Lf-Rf-C2 Lf-Rf-C-Ls2-Rs2 12
