
DVDA-Author Qt GUI how to
The new Qt5 graphical user interface aims at facilitating disc
authoring.
This webpage documents version 19.08r2 of the GUI built with
Qt5.12.4.
- Full view
- Directory view
- Authoring a disc: standard import operations
- Extracting audio from a disc
- Standard output operations
- Managing files
- Menu and Toolbar
- The project manager
- Burning a disc
- Log messages
- Options
- GUI options
- Progress bars
Full view
Just before burning a DVD, the full view of the interface is as below (here under Linux):
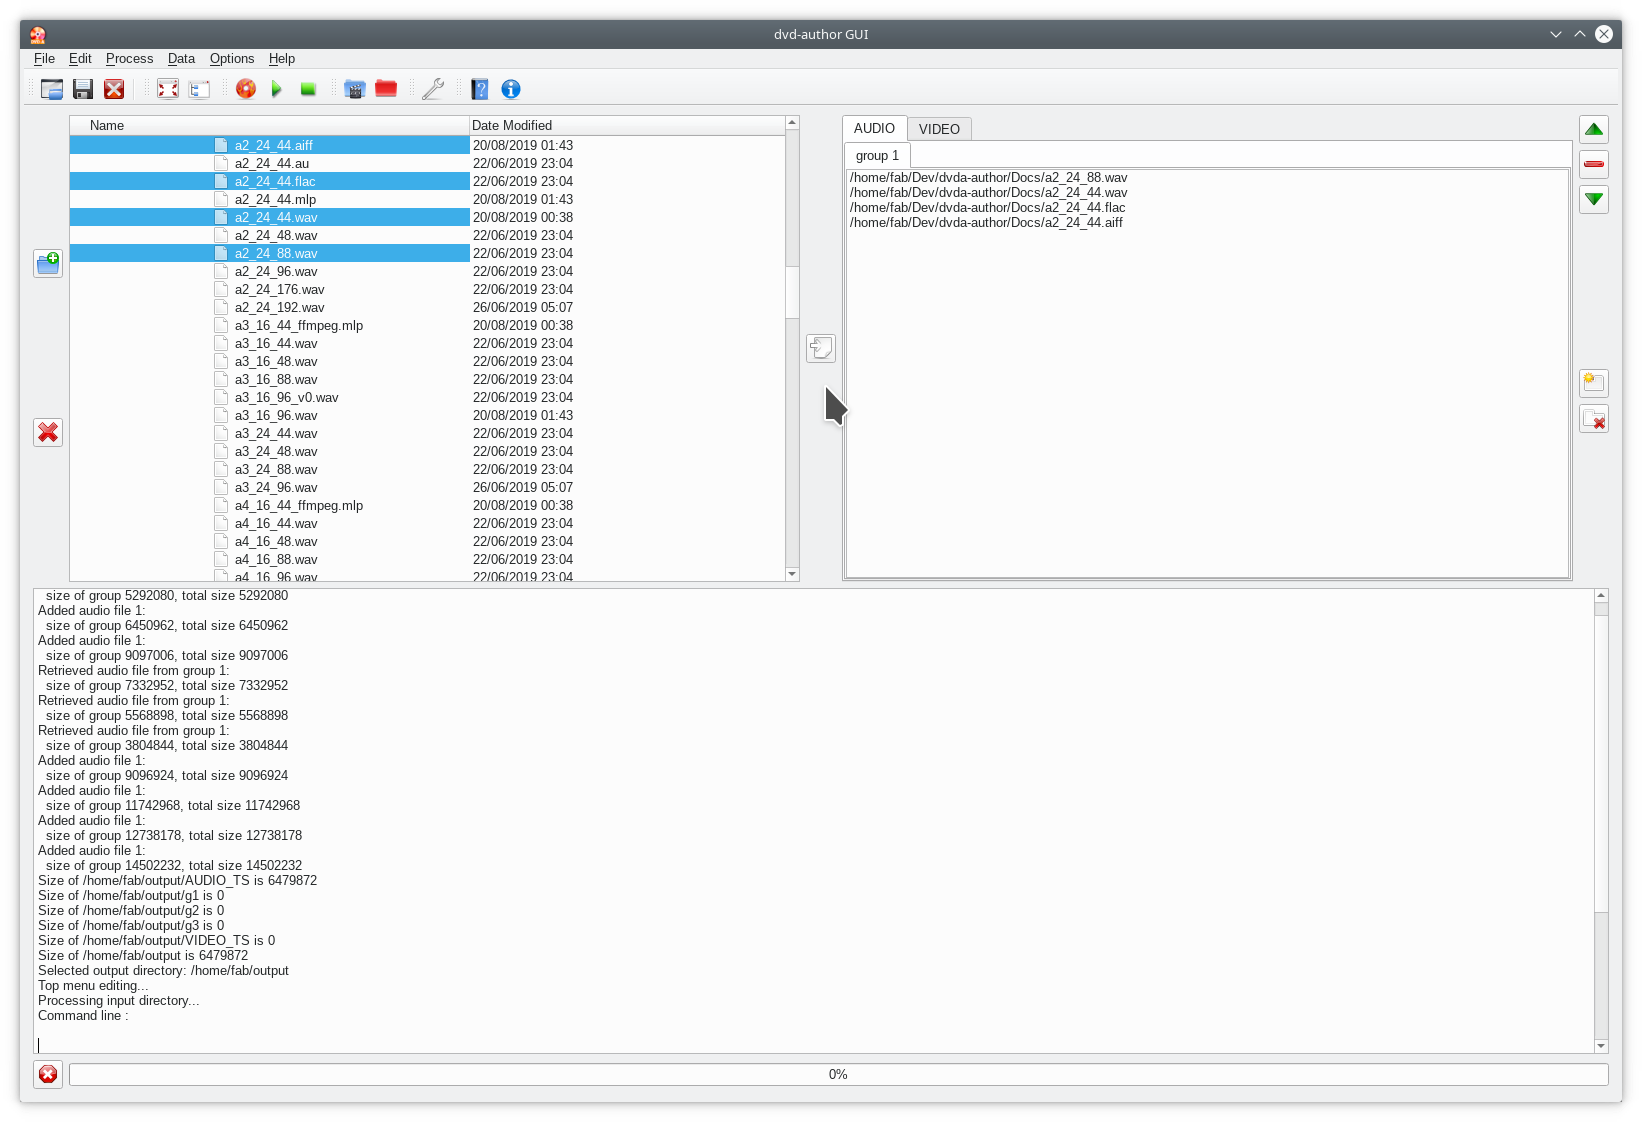
The interface consists of four zones:
- a directory view (top left), which is used to select files to be imported
- a central tab, with an AUDIO tab for DVD-Audio and a VIDEO tab for DVD-Video.
- a log window (lower half)
- a project manager (leftmost panel).
This panel can only be opened after launching a pre-recorded .dvp project file. This can be done by selecting the menu option File > Open project or the first icon .
.
Directory view
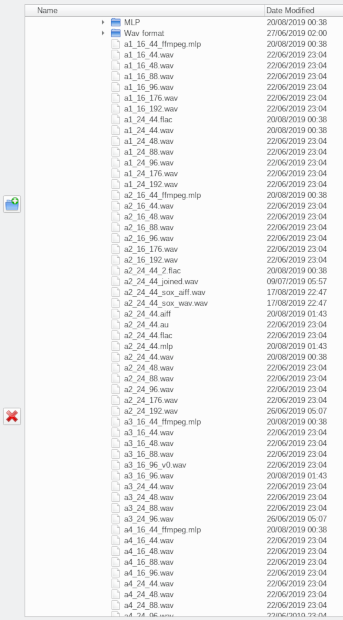
The directory view filters out all files with extensions that would not be recognized as adequate audio input.
Multiple files can be selected by using the Ctrl and Shift keys.
Audio files in the directory viewer can be played by clicking
on the "Play" icon ![]() or the
keyboard combination Alt+P followed by striking P alone.
or the
keyboard combination Alt+P followed by striking P alone.
Several audio files can be selected for playing. They will be played in the top-down order of the directory view.
Playback is stopped by clicking on the "Stop" icon ![]() or the keyboard combination Alt+P followed by
striking S alone.
or the keyboard combination Alt+P followed by
striking S alone.
DVD-Audio discs (mounted or not) and AOB files can also be played. MLP-encoded discs are supported.
Limitations
Ordinary PCM (non-MLP) discs can only be played as long as the audio characteristics (bit rate, sample rate and number of channels) of the first track are the same in the following tracks.
Discs and AOB files can only be played from start.
To play group X of a disc, select ATS_0X_1.AOB under the
AUDIO_TS directory.
If the group is large, and this file reaches the 1GB limit of DVD-Audio specifications, playback will stop at the end of this group, possibly in the middle of a track.
To avoid this, it may be preferable to play the disc (or the
filesystem in the directory view) at the root. The root is just
above the AUDIO_TS directory.
All .AOB files under this root will be played back continuously
until the "Stop" icon ![]() is
clicked.
is
clicked.
Authoring a disc: standard import operations
1. Choosing the zone
Files can be imported to either or both zones of the DVD: the Audio zone, which creates a DVD-Audio disc, the Video zone, which creates a DVD-Video disc
with mainly audio content and possibly both of them for a hybrid DVD-Audio/Video or universal disc.
Just select the appropriate AUDIO or VIDEO tab in the main tab before importing files.
2. Selecting files
The directory view can be used to select directories or files. You can add most common audio formats, including wav, aiff, flac, ogg and mlp.
On selecting a directory, all supported audio files will be added recursively to the input tabs later on.
3. Importing files
Then press the "Right arrow" or "Import" button ![]() to add the selection to the central tab.
to add the selection to the central tab.
In the tree view select any number of files (you may have to press on Ctrl and/or Shift as is usual).
You may import as many as 99 files per group from the tree view
by clicking on the import file icon ![]() (even
more if your files have same audio characteristics).
(even
more if your files have same audio characteristics).
4. Drag-and-dropping files
Alternatively to importing files from the tree view, you may also opt for dragging and dropping files from your favorite file system explorer.
Just click on the tab of the destination group and drop files into the application.
5. Option Video import
Optionally, you can add a video input directory, which must contain all VIDEO_TS files (with extensions IFO, BUP and VOB).
Then press the Video button ![]() in the toolbar.
in the toolbar.
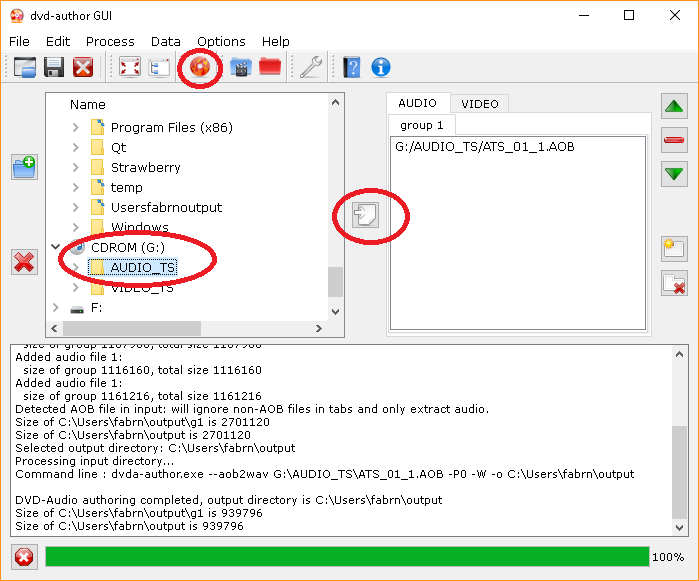
Extracting audio from a disc
If you do not want to create a DVD-Audio disc but instead extract audio from an existing DVD-Audio structure, first select the AUDIO tab in the main import tab,
then the DVD-Audio directory or disc containing the audio to be
extracted in the directory view on the left, then click on the
"Inport" button ![]()
Check the resulting tab then click on the ![]() "Burn" icon.
When AOB files are imported, this icon triggers audio
extraction, not disc burning.
"Burn" icon.
When AOB files are imported, this icon triggers audio
extraction, not disc burning.
Standard output operations
You can also select existing directories as output directories. If the directory is not empty, a dialog window will warn you that it will be
erased then recreated. Then press the Output ![]() toolbar button.
toolbar button.
Should you omit this step, the GUI will output a DVD-Audio file structure in a directory named output adjacent to the GUI executable.
To avoid overwriting an existing directory, you may choose to
erase it manually (with all its subfolders and files) by
pressing the cross icon ![]() .
.
It may also be useful to create an empty new directory with the
add directory icon ![]()
In this case, an input dialog will pop up requesting a directory name.
Managing files
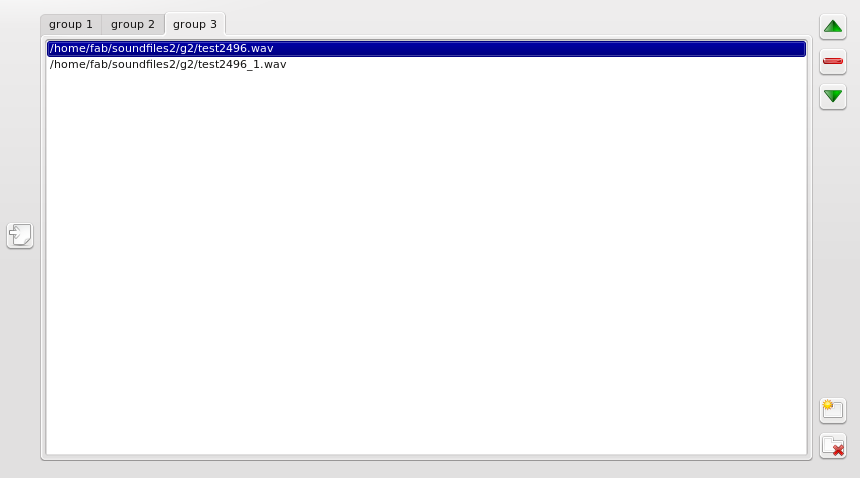
Click on the tab corresponding to the group that you would like to create.
The read minus icon ![]() on the right
may be used to withdraw a selected file from the audio list.
on the right
may be used to withdraw a selected file from the audio list.
Use the up ![]() and down
and down ![]() arrows to
move a selected file within the same audio group so that it is
played sooner (up arrow) or later (down arrow):
arrows to
move a selected file within the same audio group so that it is
played sooner (up arrow) or later (down arrow):
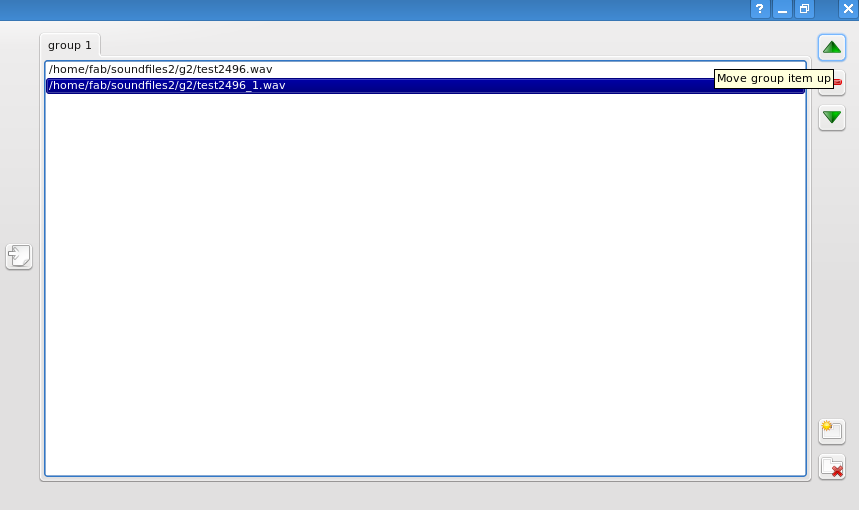
Create as many groups as are necessary (with a maximum of 9) by
clicking on the Add group icon ![]()
You may delete a selected group by clicking on the Delete group
button ![]()
Menu and Toolbar

The toolbar contains the following buttons:
- file buttons
- Open project
- Save project

- Exit button

- Open project
- edit/show buttons
- Full screen/Normal screen

- Display/Close project manager

- process buttons
- Burn

- Play

- Stop

- data buttons:
- Video

- Output

- Video
- and standard interface buttons:
- Options

- Help

- Options
A Menu displays the same commands/options as the toolbar buttons:

You can use keyboard shortcuts (e.g. under Windows, Alt+F followed by S to save a project).
The project manager
On opening a project file (with .dvp extension), the interface shows the parameters of the project on the left of the file explorer.
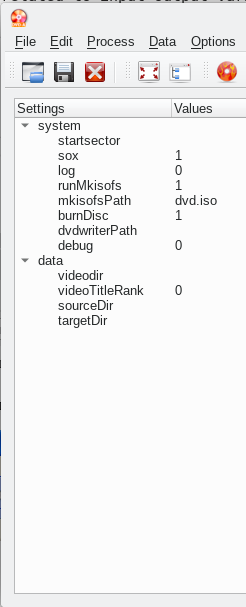
System settings are all session-specific variables, which are collected by the Options dialog (see below).
Data settings are related to input-output variables (like audio files or target output directory).You can expand or collapse the data by pressing on the +/- sign.
To display a project manager, you should first load it by
pressing on the Open project button .
The project manager window will automatically open and all files initially listed in the project maker tab widget (top right) will be displayed.
Should you like to save both session-specific system settings
and input/ouput data, create a .dvp project file by pressing on
the Save project button .
An XML file will be created with all necessary information.
Burning a disc
To burn a disc, use the Burn button on the left of the command zone.
You need to have an ISO image of the disc before burning your DVD-Audio.
This is managed by the Options dialog (see below).
To create a DVD-Audio disc press on the Burn icon.
You can deselect ISO file creation and burning in the options dialog to just create the file structure under the default output repertory (in you home directory), or under the selected Output directory.
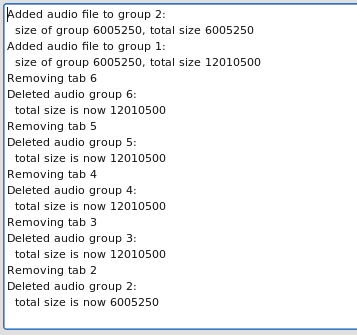
Log messages
The lower part of the interface is a log window that displays information on what is being done by the GUI or processed by dvda-author, notably
directory sizes. Below are a few messages generated while authoring a project with the project maker:
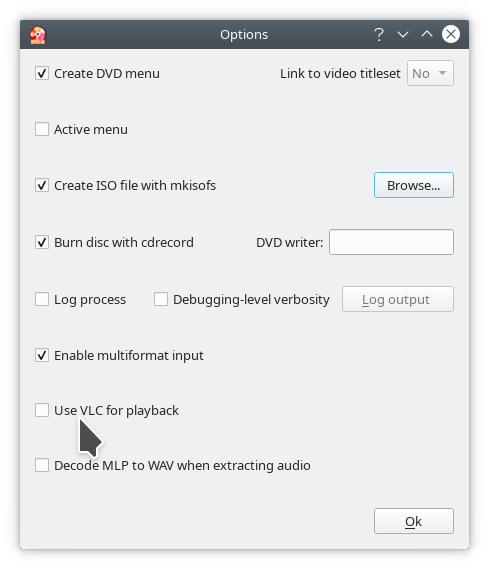
Options
An options dialog will pop up on pressing on the Options button
in the command zone.
1. Logging
To enable log file creation, check the Log process checkbox then press on the Log output button to select a log.
If the log file already exists, the new log will be appended to it and a confirmation dialog will appear (KDE linux view):
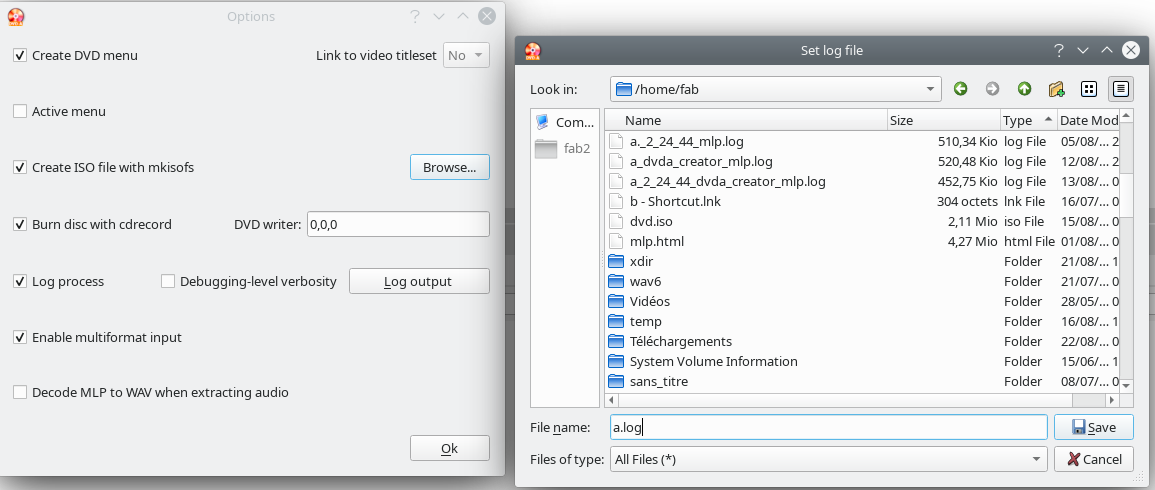
The output directory can be changed by pressing on the Browse button to select an existing filename.
Just enter a new filename in the file dialog window and save.
2. Image and disc authoring
To enable ISO file creation, the mkisofs checkbox is checked by default.
Similarly the "Burn disc" box is checked by default. Unchek if you just want to create the ISO image.
If there is only one DVD writer in the platform, it is usually automatically selected.
In some cases (several devices) it may be necessary to indicate the right DVD burner.
By default the scanbus value for cdrecord is 0,0,0. If this does not give correct results, manually change to 1,0,0 or 2,0,0 and so on.
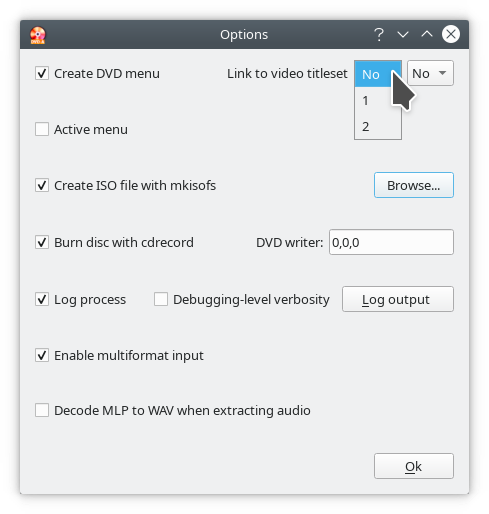
3. Menu authoring and videozone linking
By default, a top menu in the DVD-Audio zone will be generated that allows the user to navigate between tracks and groups using a remote control.
This option can be deselected in the Options dialog.
If a menu is created, one or several track links can be created optionally to one or several tracks in the DVD-Video zone.
This is only possible if files have been previously imported to the VIDEO tab.
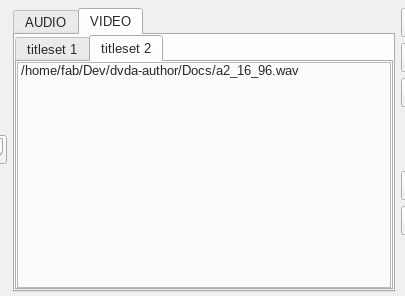
Then select the track to be linked to: click on the widget right to "Link to video titleset" and change the value from No to the rank of the track in the first titleset.
If a track in the second titleset is to be linked to, use the widget coming second to the right and so on.
Note: The total number of audio groups in the AUDIO tab and of video links cannot be greater than 9.
The "Active menu" checkbox may be checked to allow the top menu to remain visible on playback. By default, it disappears after a track link is clicked.
4. Audio formats
By default, converting usual audio formats into wav before processing the disc is enabled.
The following formats are supported using SoX:
- wav
- flac
- oga
- aif
- aiff
- aiffc
- al
- amb
- au
- avr
- cdda
- cdr
- cvu
- gsm
- gsrt
- hcom
- ima
- ircam
- la
- lpc
- lpc10
- lu
- maud
- mlp
- nist
- ogg
- s16
- s2
- s3
- s32
- s4
- s8
- sb
- sf
- sl
- sln
- smp
- snd
- sndr
- sndt
- sph
- sndt
- sw
- txw
- vms
- voc
- vorbis
- vox
- wavpcm
- wv
- wve
- xa
An internal MLP (Meridian Lossless Packing) decoder is integrated using capabilities developed by the ffmpeg project.
Warning
Using this decoder may raise legal issues in some countries (outside of the European Union).
Please make sure that using the ffmpeg MLP decoder/encoder is legal in your country before checking the "Decode MLP" box to activate automatic MLP conversion to WAV.
This decoder is optionally used when disc audio is extracted as
indicated above. When the box is checked, discs with MLP-encoded
content will be extracted both as .mlp and .wav files.
5. Playback
Currently playback is performed by ffplay or alternatively by VLC. By default, playback is performed by ffplay under all supported *nix platforms (GNU/Linux, Mac OSX, and FreeBSD should be added soon).
By exception, under Windows, the default player is VLC.
In any case, VLC can be chosen or deselected by checking or
unchecking the appropriate box in the Options dialog.
GUI options
The Full screen button maximizes the size of the
application.
The icon automatically toggles to the Show normal icon  when the
window is maximized.
when the
window is maximized.
If you press again on the same button, the size of the window will be changed back to normal size.
Progress bars
A progress bar will display the real-time percentage of expected ouput that was already processed by dvda-author.
If an ISO image is created, another will appear to indicate progress of ISO file creation below the first progress bar.
If you burn your disc, a third bar will appear to indicate progress of DVD burning.
If the burning process appears frozen, reset your writer and open/close your tray. Wait for a while then launch again by pressing on the "Burn" icon.
You can kill any process by pressing on the Stop process button
![]() on the left of the progress bar.
on the left of the progress bar.
